Getting started with ReturnZap
Welcome to ReturnZap! Easier customer returns are just a few clicks away. ReturnZap is full of powerful functionality to create return labels, customize you return policy, and save you precious time.
This guide will walk you through key features of ReturnZap and provide step by step instructions to get the most out of the tool.
In This Getting Started Guide:
- Configuring your return policies
- Defining your return reasons
- Configuring shipping details
- Choosing return shipping methods
- Configuring customer returns notifications
- Embedding the self service customer returns portal
- Creating custom rules for advanced returns policies
How Returns Work in ReturnZap
Returns are created in ReturnZap in one of two ways:
- Through the customer facing returns portal that you link to or embed in your Shopify site. We'll talk about how to configure this later in the guide.
- By shop administrators, on behalf of customers. We won't cover this in this getting started guide.
Every Shopify merchant handles returns differently. ReturnZap is built to be flexible and to work for the needs of all merchants. We configure some defaults for you but you need to complete configuration of the app before you can get started!
Configure Your Return Policies

- ReturnZap allows you to configure your returns policy - select whether your policy allows for refunds, exchanges, and/or refunds to store credit
- Configure your return policy by navigating to Settings > Policy within the ReturnZap app
- Define your return policy for each return method. You can define a policy based on days since delivery or days since order. Customers whose orders fall outside of these windows will not be permitted to submit a return.
- Depending on your plan, you will have the option to configure one click resolution of refunds, exchanges, and store credit from within ReturnZap and to define default restocking fees
- You can further customize this return policy by creating rules to define flexible return windows (more on this later)
Define Your Return Reasons

- Within the Settings > Policy page, you may also define custom return reasons
- Return reasons will be displayed to customers via the self service returns portal and associated with the RMA for tracking purposes
- By default, ReturnZap defines the following return reasons: Damaged or Defective, Did Not Like, Wrong item, Wrong Size, Other
- You can delete, rename, or reorder the default return reasons. You can add new return reasons by clicking "Add new return reason" and then saving the page.
- Image upload requirements are disabled by default but can be configured on a reason by reason basis. If enabled, customers will be prompted to upload an image of their return through the ReturnZap portal.
- You can also add translations for return reasons by clicking the Translations tab and adding your own translations for the default reasons
Learn More About Return Reasons >>
Configuring Shipping Details
- Configure return shipping information in Settings > Shipping
- ReturnZap will automatically import your default Shopify address as the default return address. You can change this if necessary on this page.
- This is where you will choose which return shipping methods will be available to your customers. More on this in the section below.
- Depending on your plan, you can enable green returns, which do not require return shipping
- You can define one or more package dimensions. If only one package is defined ReturnZap will useitas the default for all return shipments created through shipping integrations. If more than one package is defined, customers will be prompted to select the appropriate package size when initiating a return through the portal.
Choosing Return Shipping Methods
- ReturnZap supports 3 types of customer returns:
- Customer ship using their own label
- Prepaid store label
- Customer paid label during returns flow
- You can enable and configure each of these options using the ReturnZap label settings page
- Until you configure your settings customers will be able to return using their own labels and via paid labels
- Navigate to Settings >> Shipping and Return Labels
Learn More About Return Labels >>

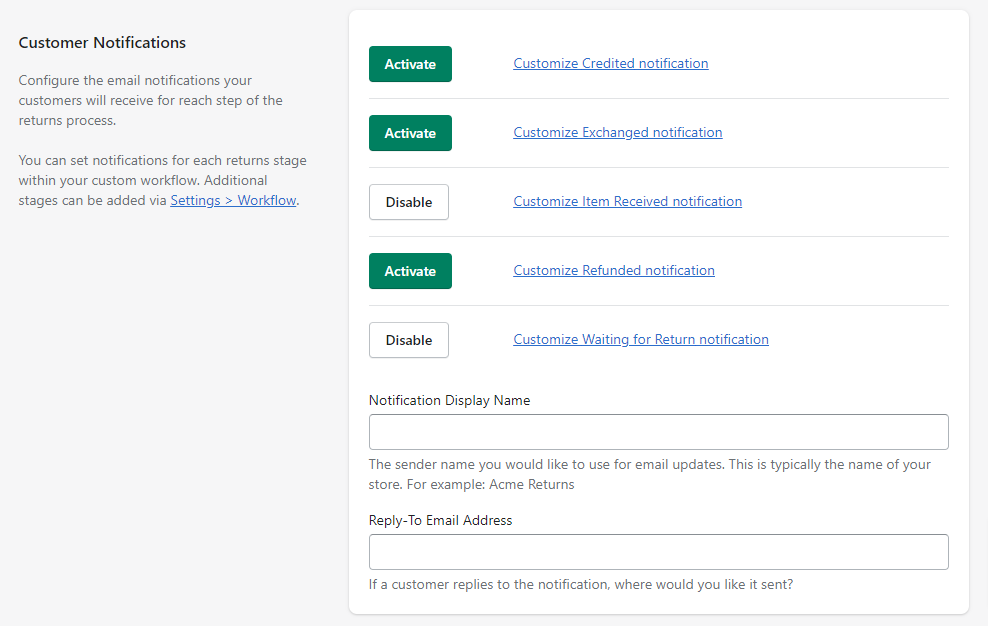
Configure Customer Notifications
- With ReturnZap, you can completely customize the notifications that your customers receive throughout the returns process
- Navigate to Settings >> Notifications to see a list of templates that can be modified to match your shop look and feel
- Edit the send from email address from which customers receive notifications
- For reach return stage you have configured, add text to the email body if you wish to notify customers when a return enters this status. For example, you can use this setting to notify customers that their return has been received and a refund is on the way.
- Customize the message displayed to customers when they successfully initiate a return via the embedded returns portal - full HTML is supported!
Learn More About Notifications >>
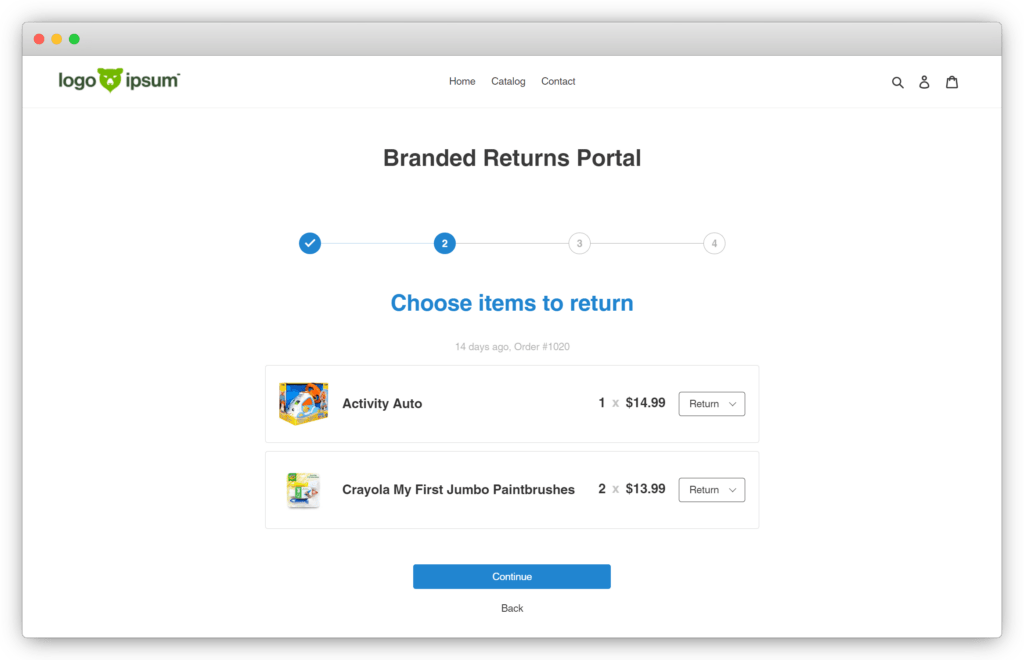
Embed the Returns Portal
- ReturnZap allows you to embed a self service customer returns portal directly on your Shopify storefront
- Navigate to Settings >> Customer Portal
- Copy and paste the embeddable Javascript code anywhere you wish to display your returns portal
- Note: As of February 2023 ReturnZap has released an updated returns portal. We will continue to support the legacy portal for the foreseeable future. You may choose to embed either portal from your Customer Portal settings page.
- Once added to your shop, you can customize the look and feel of the returns portal with some simple code. See how: New Portal or Legacy Portal
Learn More About the Portal >>
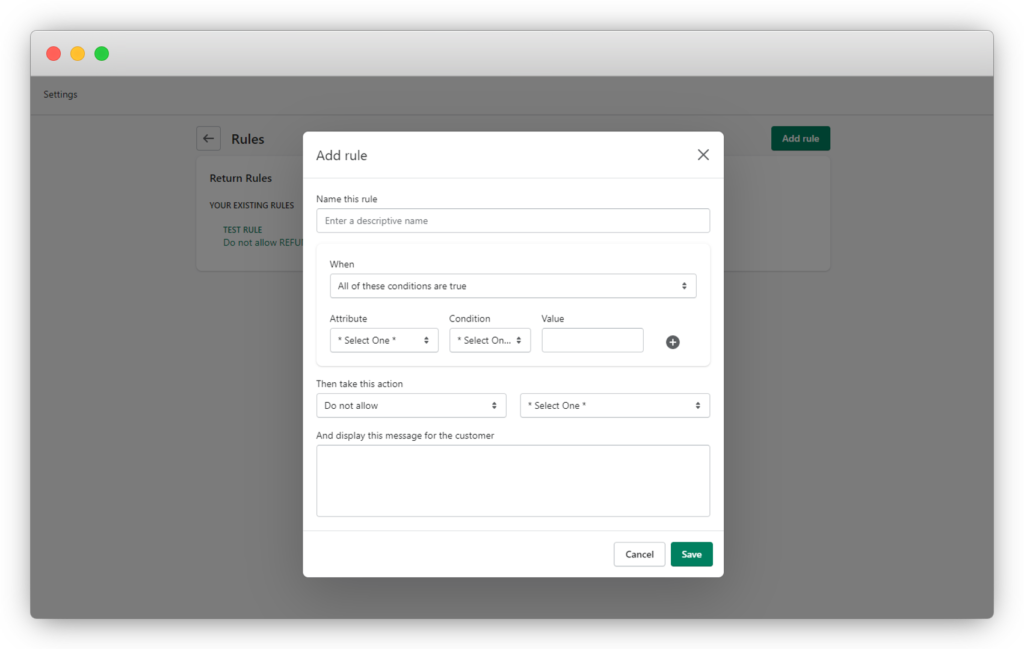
Define Powerful Rules
Note: Rules are only available on the Standard and Pro plans
- If you wish to add advanced functionality and build logic around customer returns, go to Settings >> Rules to configure your own custom workflows
- Rules work by specifying one or more conditions and one or more actions. You can configure the rules to apply the action(s) if any or all conditions are met
- Store owners can use rules to route returns back to different warehouse for different vendors - this is especially useful if you are dropshipping
- Other examples include preventing returns if order value is below a certain threshold, or only allowing refunds to store credit for certain return reasons. The sky is the limit!
You should now be well on your way to using ReturnZap to the fullest to take the headache out of managing your customer returns workflows!
Can't find what you are looking for? Check out the ReturnZap help center for more information, or reach out to ReturnZap customer service at support@returnzap.com.